

VOVX10
VoV X10 Quick Start Guide
Package Contents:
√ GPS tracker with SIM card installed √ USB – Type C charging cable √ Mini screwdriver
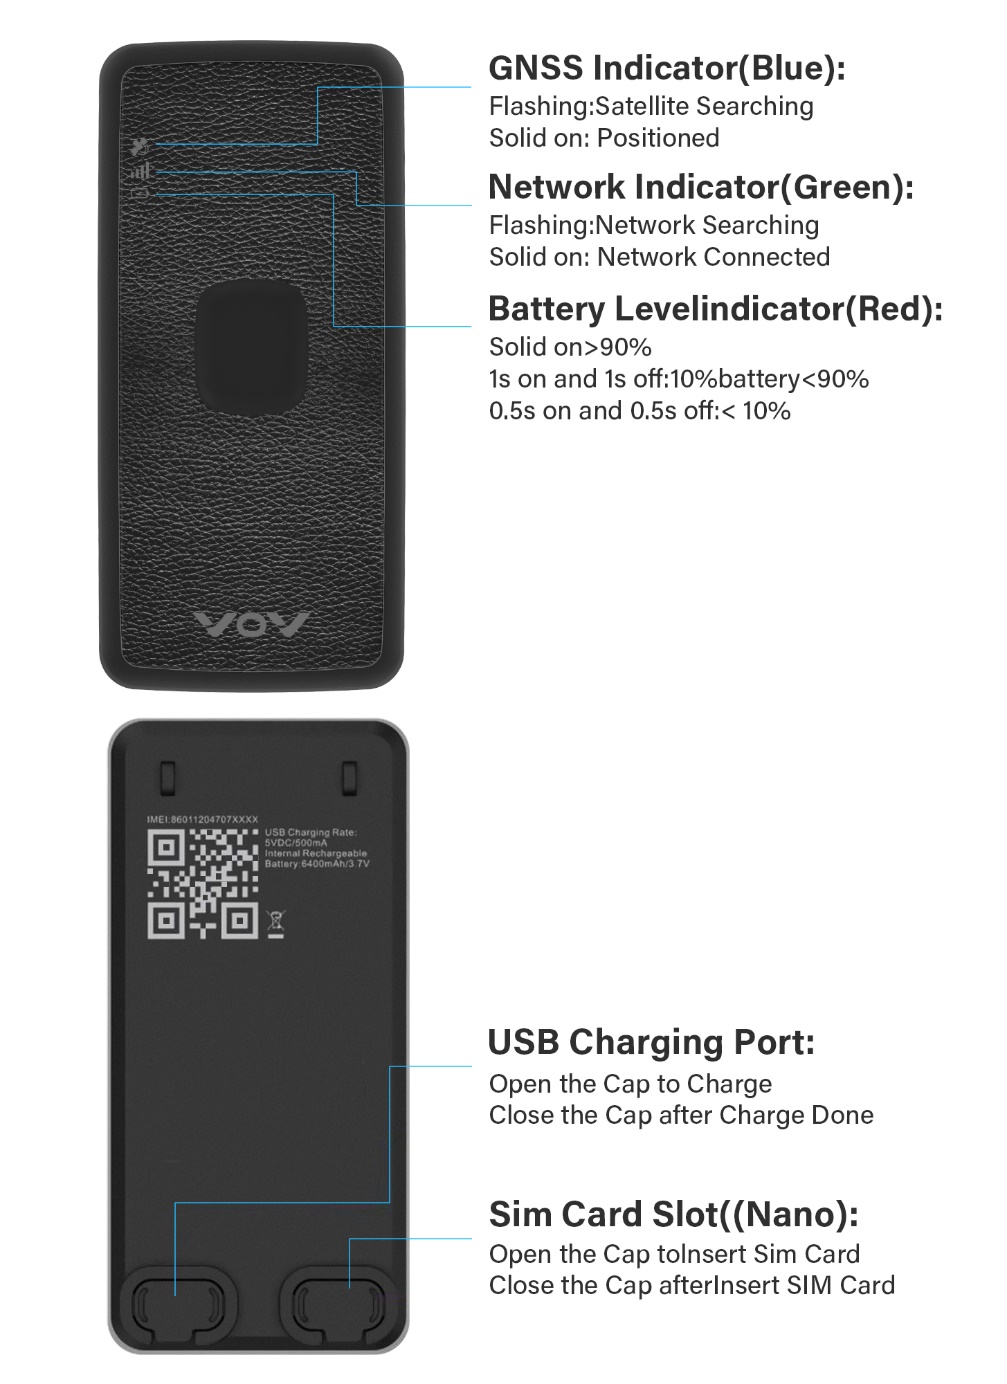
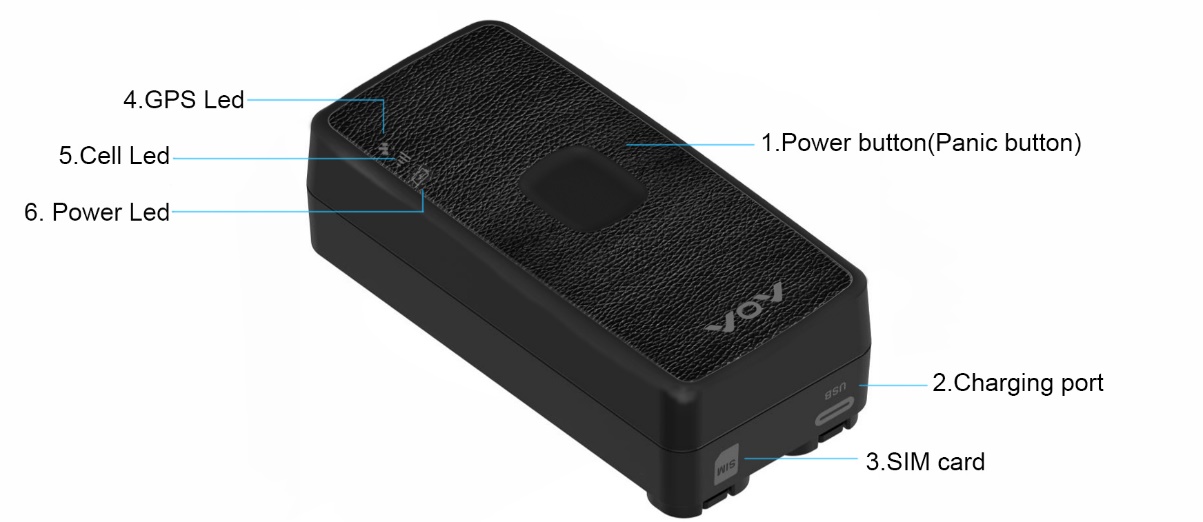
Button and Indicators
1.Power Button (Panic Button)
2.Charging Port(Type-C)
3.GPS Led (Blue)
4.Cell Led (Green)
5.Power (Red)
Quick Start Guide
Charge your device
To charge, connect type-C end of the cable to the charging port at the back of the tracker and the other end to a USB wall charger port. When charging, the red light blinks. In order to get maximum battery and ensure deep charge, you will need to charge continuously for about 7 hours.
Turning on your device for the first time
The device usually turns itself on when connected directly to power. So first, check if the device has already turned on: just touch the power button to see if the red light comes on. If no light comes on, the device is off. In that case, tum it on by pressing and holding on the power button for 6 seconds.
Download the App, creating your account and activating the device
Scan the QR code located on the package to download the App VOV IOT on your Android or IOS smartphone then follow the prompted steps.
Setting up tracking intervals - Important!
Please keep in mind the longer the tracking time interval the longer your battery will last. Not in a very urgent situation, it is recommended that setting the tracking interval at one minute or more.
Placing your device and track
Choose a appropriate location on your car to place the tracker, whether hidden or not, and please do not place it in an overheated area such as inside the hood.
Alerts (need to be turned on in the alarm configuration in “Configure” of the App):
SOS alert - You will receive a notification when the SOS panic button is pressed.
Speed alert - You will receive a notification when the tracker moves faster than the speed pre-defined by you.
Low battery alert - You will receive a notification when battery level is low.
Movement alert - You will receive a notification when the tracker starts to move.
Geofencing crossing alert - You will receive a notification when the tracker enters or exits Geofencing.
Who receives the alerts? - The app that binds the device receives these alerts. You can easily add more people who will receive the SOS alerts and you also can add more devices in one account.
How to use the SOS button – In the power-on state, press the power button and hold it down for at least 6 seconds, you will then see all 3 lights blinking and vibrates. SOS alert also needs to be turned on in the alarm configuration. This will cause the SOS alert to be sent, with the exact location of where it was pressed.
Geofencing - The VoV devices can alert you if it crosses the boundaries of a certain area that you set up on the map, like your house, street or neighborhood. This area is called a Geo Fence.
History reports - You can generate history, trip and alert reports for any of your devices that have tracking intervals enabled. Simply go to History Replay and you have an option to select a device, a date range and which type of report you want to Generate or download.
Battery life (move 2 hours per day):
| Performance Mode | 5s update while moving | 21days |
| Fast Mode | 30s update while moving | 64days |
| Standard Mode | 1 min update while moving | 79days |
| Slower Mode | 5 min update while moving | 94days |
| Power Saving Mode | 10 min update while moving | 168days |
APP Subscription Plan and Price
Tracking Update Refresh Time
Standard: update per 60s
Plus: update per 30s
Premier: update per 5s
Month-to-Month Plan
$16.99 per month
$26.99 per month
$33.99 per month
Pre-Pay 3 Months
$15.29 per month
$24.29 per month
$30.59 per month
Pre-Pay 12 Months
$11.04 per month
$17.54 per month
$22.09 per month